How to deploy your ReactJS project to Netlify using cli and CI/CD
October 12, 2020
Intro
In the next couple of minutes I am going to lead you thru the simple process of setting up your ReactJS project for CI/CD (Continuous Integration / Continuous Delivery), with the help of Netlify and Github.
Assumptions
I assume that your ReactJS project is connected to a Github repo. If not, it’s not a major problem, however, the instructions below may not 100% be accurate for a local only project.
Get a Netlify account
They have a generous free tier, signup here. I am not affiliated
Make sure your project secrets are setup correctly
When developing a dynamic webapp (e.g.: some data is pulled from apis) you almost always have some client identifier and secret, in order to authenticate with the remote api server. You’ll need to make sure that these credentials are well protected.
During ReactJS webapp development, you maybe storing these on the filesystem in the .env.local file and access them in your code with process.env.CREDENTIAL-DEFINED-IN-ENV-LOCAL like:
...
    const dataRepos = await axios.get(
      "https://api.github.com/users/" +
        text +
        `/repos?sort=created:asc&client_id=${process.env.REACT_APP_GITHUB_CLIENT_ID}&client_secret=${process.env.REACT_APP_GITHUB_SECRET}`
    )
...
As .env.local is usually added to .gitignore, so it is not really a good candidate for prod builds, so we need to find another way of accessing these in a prod environment. I’ll demonstrate how to setup environment variables in Netlify in a minute, but now let’s make the necessary changes in our code to make sure both local (development) and production builds can access these credentials.
...
const githubCredential = {
  clientId: "",
  clientSecret: "",
}

if (process.env.NODE_ENV === "production") {
  githubCredential.clientId = process.env.GITHUB_CLIENT_ID
  githubCredential.clientSecret = process.env.GITHUB_CLIENT_SECRET
} else {
  githubCredential.clientId = process.env.REACT_APP_GITHUB_CLIENT_ID
  githubCredential.clientSecret = process.env.REACT_APP_GITHUB_CLIENT_SECRET
}
...
    const res = await axios.get(
      "https://api.github.com/" +
        (qry && "search/") +
        `users?client_id=${githubCredential.clientId}&client_secret=${githubCredential.clientSecret}&q=${qry}`
    )
...
We initialized the githubCredential object and then based on the runtime environment (process.env.NODE_ENV) we setup the credential object’s attributes. Note the on a non-production environment we still access the .env.local stored values (more on custom react app environment variables here), while on a prod environment we simply reach out to a normal environment variable (not prefixed with REACT_APP_).
Then in your code further down you just need to reference the githubCredential.clientId and githubCredential.clientSecret attributes.
Install the Netlify client interface - netlify-cli
OK, this is a one time task ans basically just run:
sudo npm i -g netlify-cliConfigure your ReactJS project for netlify-cli use
Create a netlify.toml configuration file in your project root as follows:
[build]
  publish="build"
This is basically telling the netlify-cli which folder to publish upon build.
Initialize your project for Netlify
Now, let’s enable our project for netlify use, run in your project root:
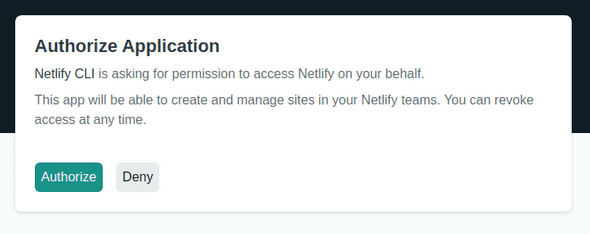
netlify initWhen you first run it they will ask for authorization for the netlify-cli, just authorize it, e.g.:
Then choose:
- Create & configure a new site
- enter your team details
- enter unique site name
- choose if you want to Authorize Github through netlify or enter credentials manually (I did choose authorize)
- Your build command: npm run build
- choose deployment directory (e.g.: build)
Once done, you’ll receive the Success! Netlify CI/CD Configured! message.
Next you can enter:
netlify openWhich in turn will take you to your netlify project’s page and you can see that your first build finished, however, it’s not 100% ready yet, but that’s fine we are fixing it now.
Setup Netlify environment variables
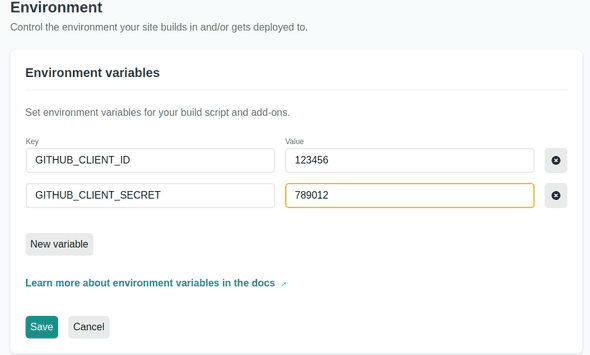
It’s time to setup the environment variables that will hold the api client credentials. On the dashboard go to:
Site overview => Site settings => Build & deploy => Environment
Then press Edit variables and add your variables and their values:
Re-build the project and publish it
Let’s re-build our site and publish it, go to : Deploys => Trigger deploy => Deploy site
From now on every push to the git repo will result a new build and publish of your site (these can also be configured on the dashboard).
You are now all setup for ReactJS / Github / Netlify integration and CI/CD. Enjoy!

